imgskit Journal
Imgskit Image Generate Outpainting Guide: How to Extend Images Without Cropping
Introduction
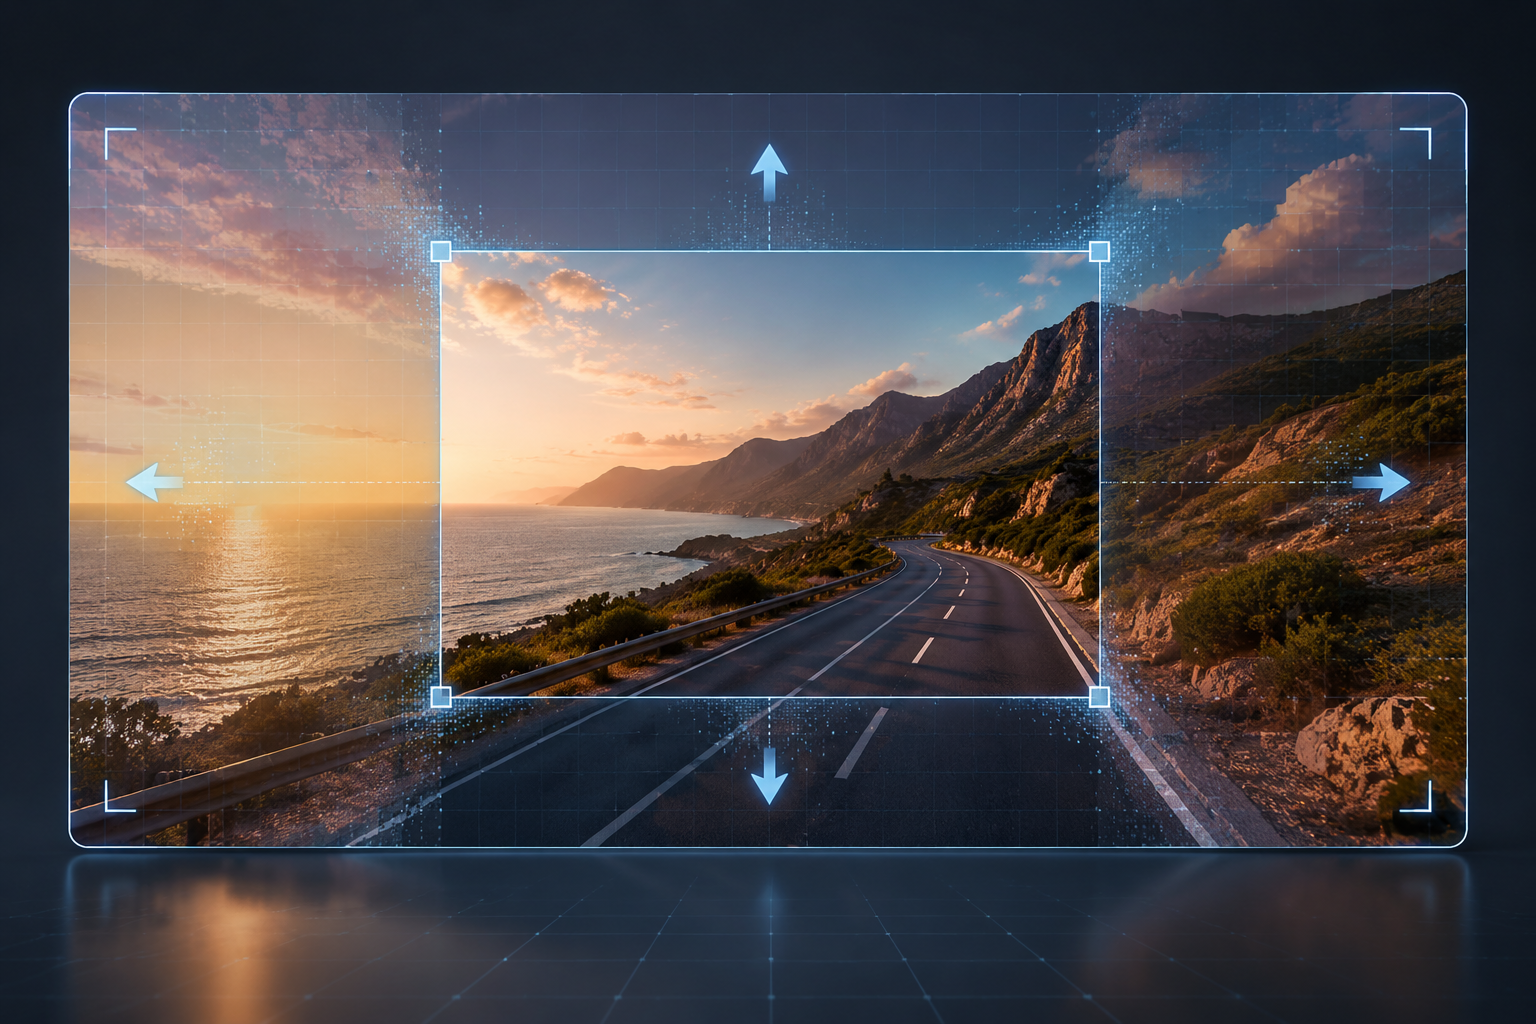
When an image looks too tight or does not fit the required format, cropping is usually the first solution people try. However, cropping often removes important details and changes the original composition.
With Imgskit Image Generate, you can use the built-in Image-to-Image workflow to extend your image canvas through AI outpainting. Instead of cutting away parts of your photo, the tool expands the surrounding area and creates new background content that matches the original image.
Whether you need to convert a portrait into a 9:16 social media image, resize a product photo for an online store, or create a wider banner design, Imgskit helps you expand images while keeping the main subject and original style consistent.
What Is AI Outpainting?
AI outpainting is an image editing technique that extends the area outside the original image boundaries. The AI analyzes the existing photo and generates new content around the edges, matching the original lighting, colors, perspective, and texture.
Unlike traditional resizing, outpainting does not simply stretch the image. It creates additional background space while preserving the important elements inside the original frame.
Outpainting vs Inpainting: What's the Difference?
Although both techniques use AI image editing, they solve different problems.
Inpainting
Inpainting modifies existing areas inside an image.
Common uses:
- Removing unwanted objects
- Fixing damaged areas
- Erasing watermarks
- Replacing specific elements
Outpainting
Outpainting expands the image beyond its original borders.
Common uses:
- Changing aspect ratios
- Adding more background space
- Creating wider compositions
- Preparing images for different platforms
For example, a vertical portrait can be expanded into a landscape banner without cutting off the person or changing the original photo.
Why Use Imgskit Image Generate for Image Extension?
1. Convert Images to Any Aspect Ratio
Different platforms require different image sizes. A photo that works well on one platform may not fit another.
Imgskit Image Generate allows you to extend images for popular formats such as:
- 9:16 for TikTok, Instagram Reels, and mobile content
- 16:9 for YouTube thumbnails and website banners
- 3:2 for photography websites and digital displays
- 1:1 for social media posts and product listings
Instead of cropping important details, you can create additional space around the original image.
2. Improve Product Photos for E-Commerce
Product images often need different layouts depending on where they are displayed.
Outpainting can help you:
- Expand product backgrounds
- Create banner-style product images
- Add more space for text placement
- Adapt existing photos for different marketplaces
This is useful for online stores, advertisements, and promotional materials where image dimensions frequently change.
3. Fix Crowded Photo Composition
Some photos look visually crowded because the subject is too close to the edges.
Image extension can add natural space around:
- People
- Landscapes
- Architecture
- Travel photos
- Outdoor scenes
For example, a close-up travel photo can be expanded to show more sky, ocean, mountains, or surrounding scenery while keeping the original subject unchanged.
4. Create Space for Posters and Marketing Designs
Designers often need empty areas for:
- Headlines
- Product information
- Promotional text
- Call-to-action buttons
Instead of redesigning the entire image, you can extend one side of the canvas and create a clean area for additional design elements.
How to Extend an Image with Imgskit Image Generate
Follow these steps to create an extended image:
Step 1: Open Image Generate
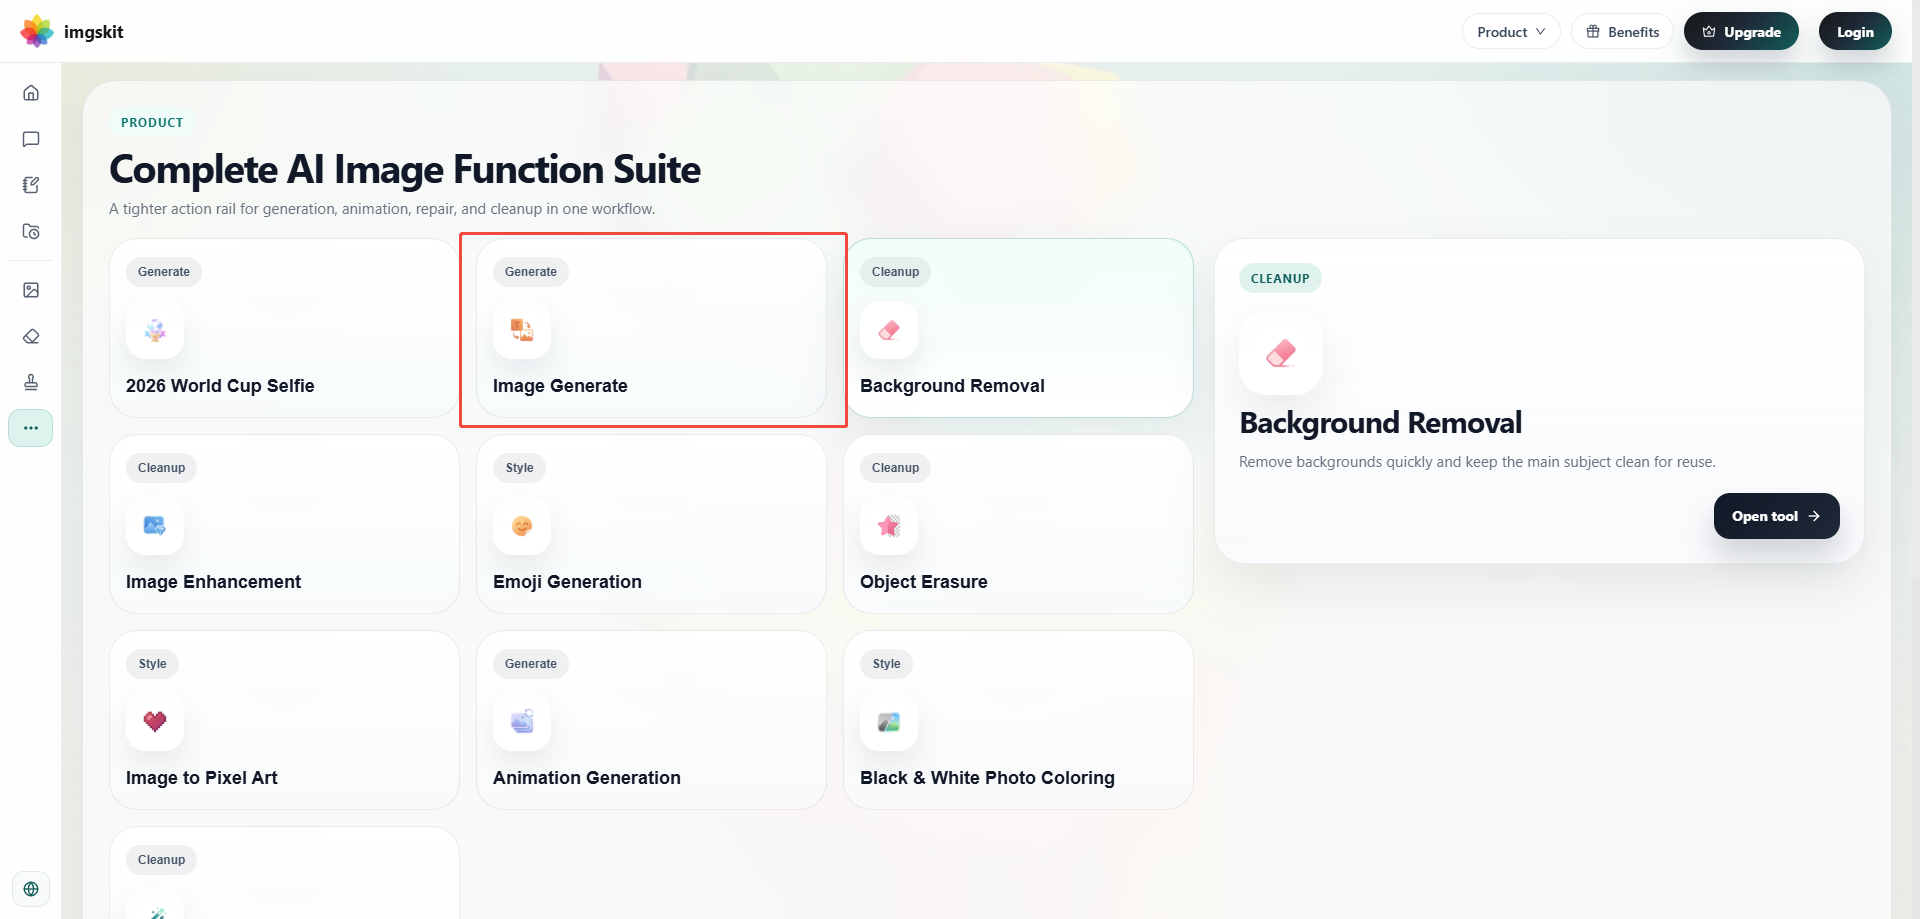
Go to Imgskit Image Generate and select the image editing workflow.
Step 2: Upload Your Original Image
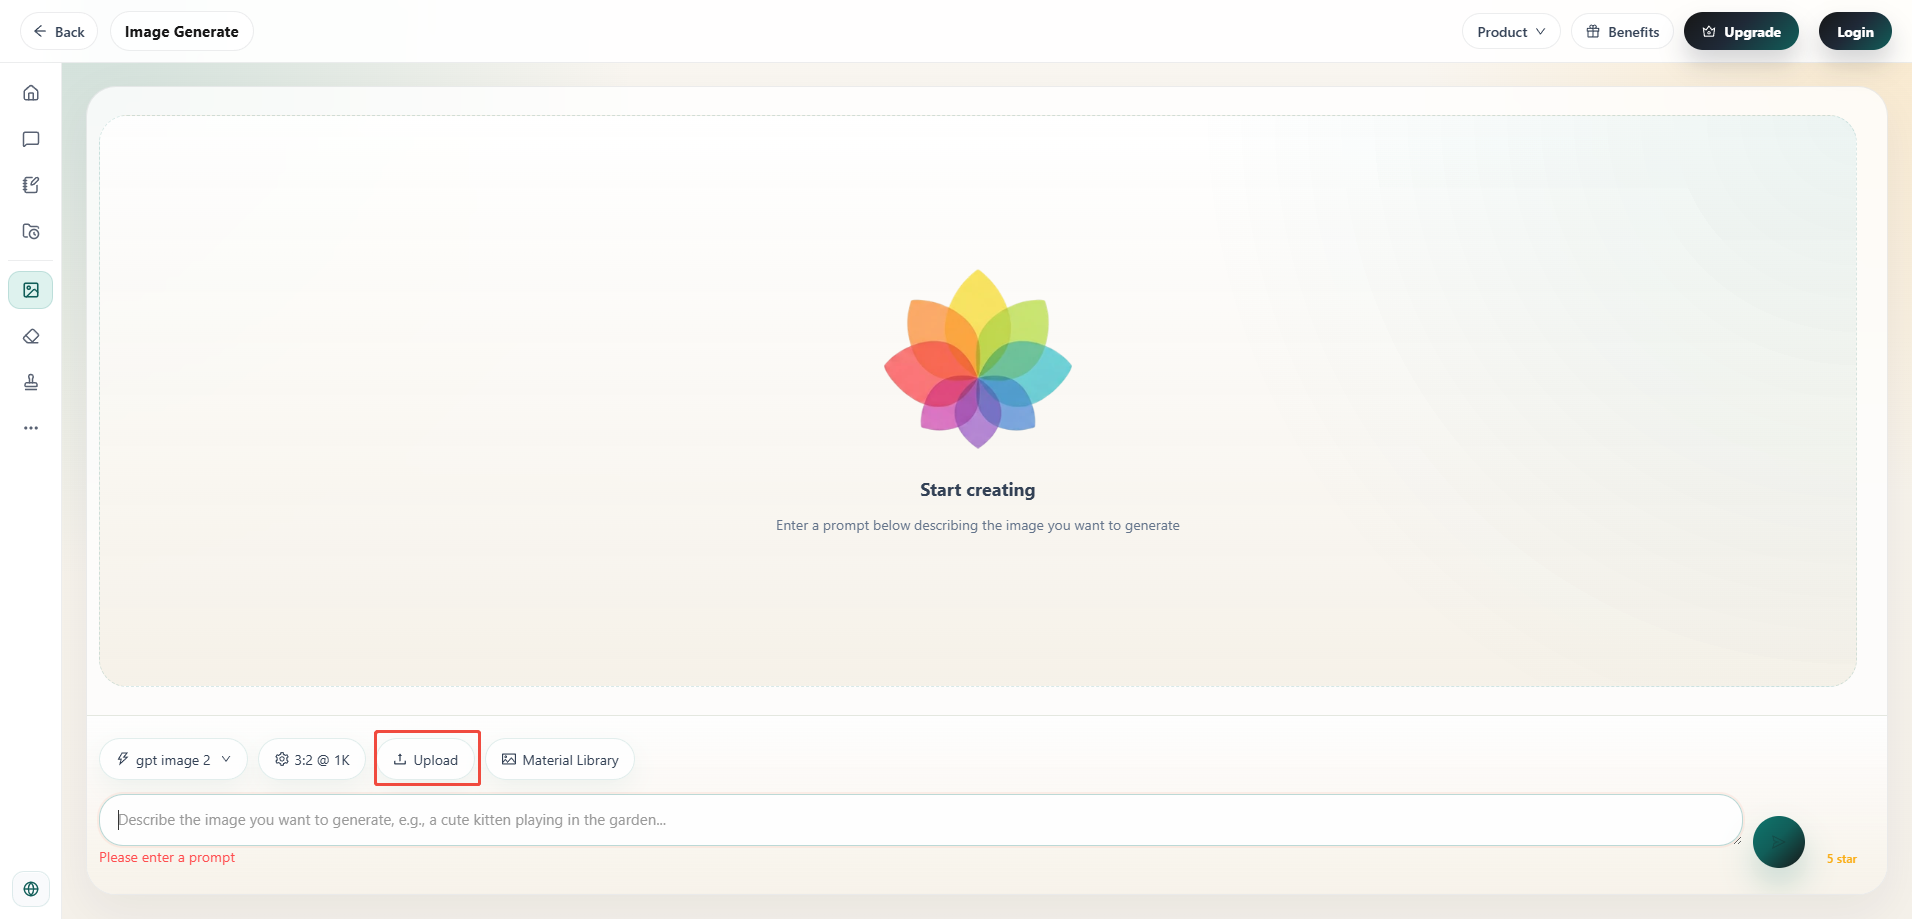
Switch to Image-to-Image mode and upload the photo you want to expand.
Step 3: Choose Your Target Ratio
Select the final image size based on your purpose:
- 9:16 for vertical videos
- 16:9 for wide screens
- 3:2 for photography layouts
- Custom ratios for specific designs
Step 4: Add an Outpainting Prompt
Use a clear prompt that tells the tool what should remain unchanged.
Example:
Keep the main subject, pose, facial details, lighting, and original composition unchanged. Extend the image borders naturally with matching background scenery. Preserve the original style, colors, and textures. Create a seamless realistic image extension without distortion.
Step 5: Generate and Review the Result
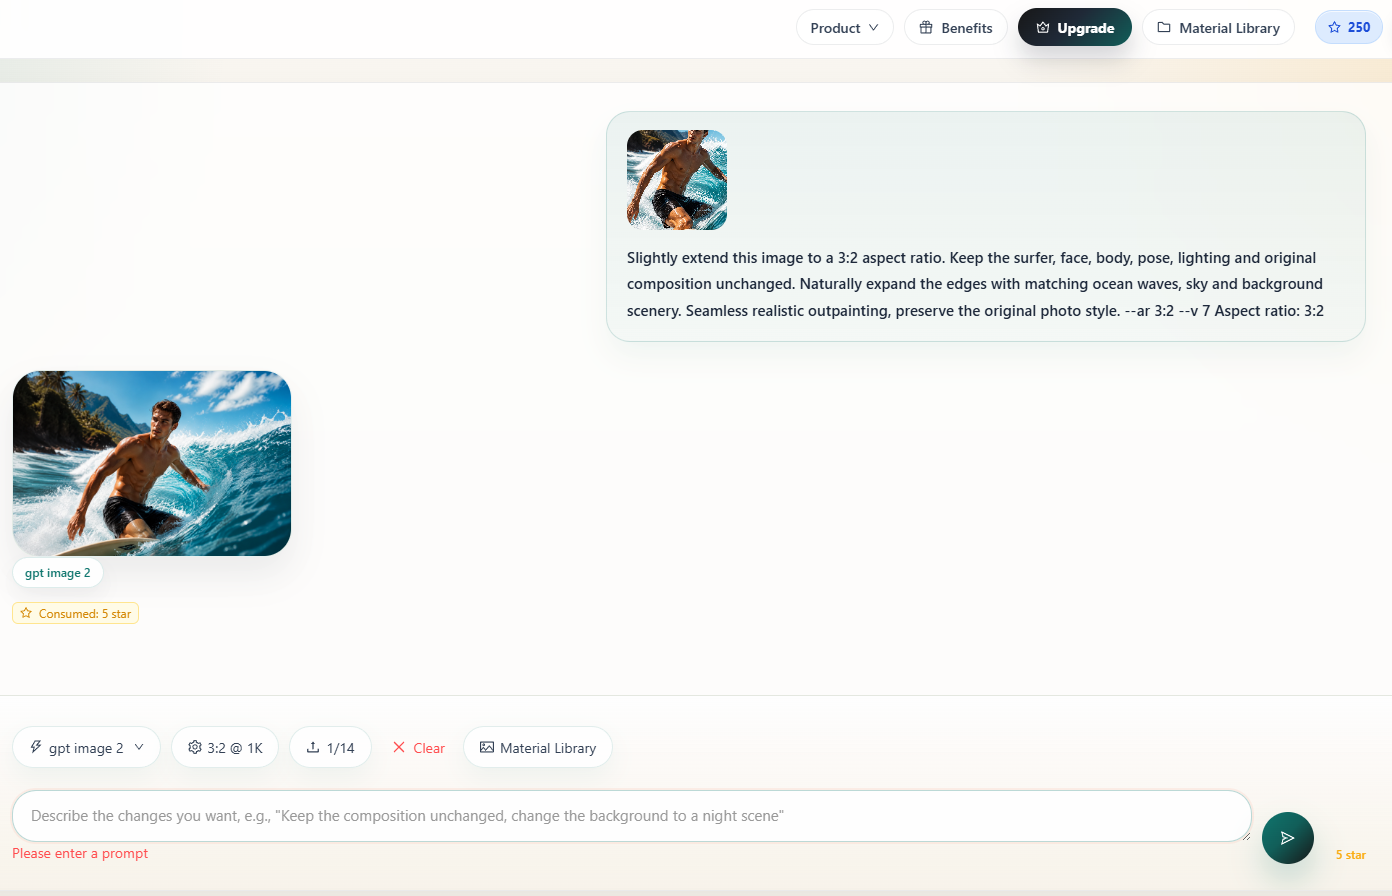 After generation, check:
- Subject details
- Background consistency
- Lighting match
- Edge transitions
If needed, adjust the prompt and generate another version.
Tips for Better AI Image Expansion Results
Expand Gradually
Large expansions in a single step may create inconsistent details. Extending the canvas in smaller steps usually produces more natural results.
Describe the Existing Environment
Adding simple scene information helps maintain consistency.
Examples:
- "extend the ocean and waves"
- "continue the mountain landscape"
- "add more blue sky"
- "continue the indoor background"
Lock Important Details
If your image contains a person, product, or important object, include instructions such as:
- Keep the subject unchanged
- Preserve original details
- Do not modify the position or shape
This reduces unwanted changes.
Match the Original Style
Mention the existing photography style when necessary:
- Realistic photography
- Cinematic lighting
- Natural colors
- Studio photography
- Outdoor photography
Final Thoughts
Imgskit Image Generate provides a simple way to extend images beyond their original boundaries. Instead of cropping important details, AI outpainting adds new background space while maintaining the original composition and visual style.
From social media content and product photography to banners and creative designs, image extension makes it easier to adapt one photo for multiple purposes without starting from scratch.